|
In NextGen CM/ECF a user must always upload a PDF when filing. Documents are attached to a filing event using the Upload Documents section of the File a Document screen.
Note: All PDFs filed in the Second Circuit must be text-searchable. For information on creating a searchable PDF, click here. Filed PDFs must not be corrupt or contain malicious links or links that launch programs. To check the PDF before uploading, follow these instructions.
Follow these steps to upload a PDF to a filing.
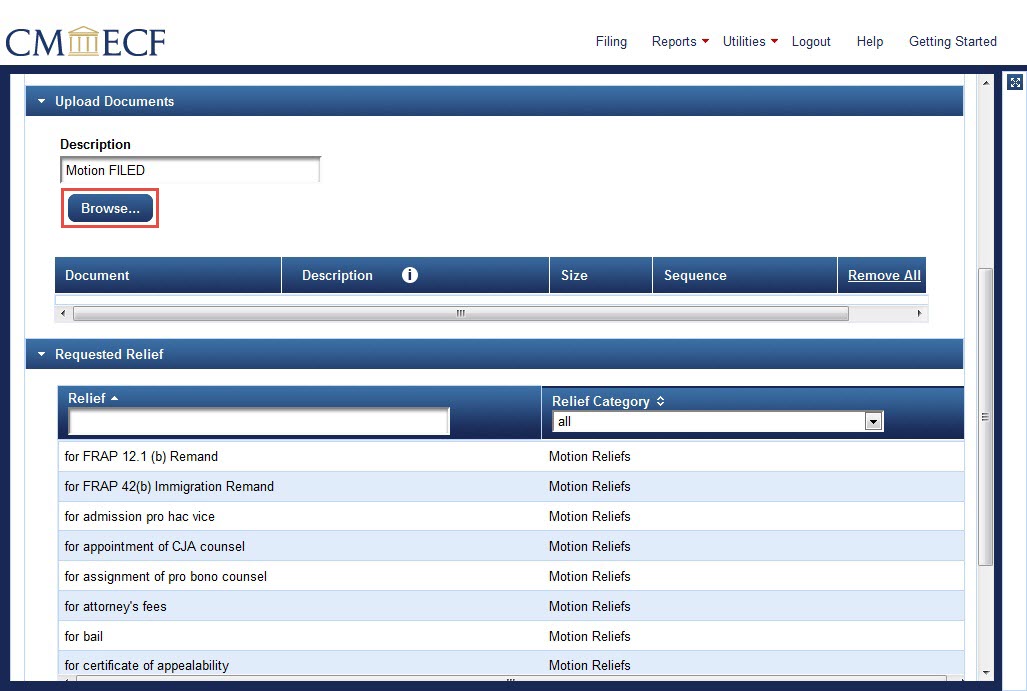
1. In the Upload Documents area in the middle of the File a Document screen, click the Browse button below the Description box.
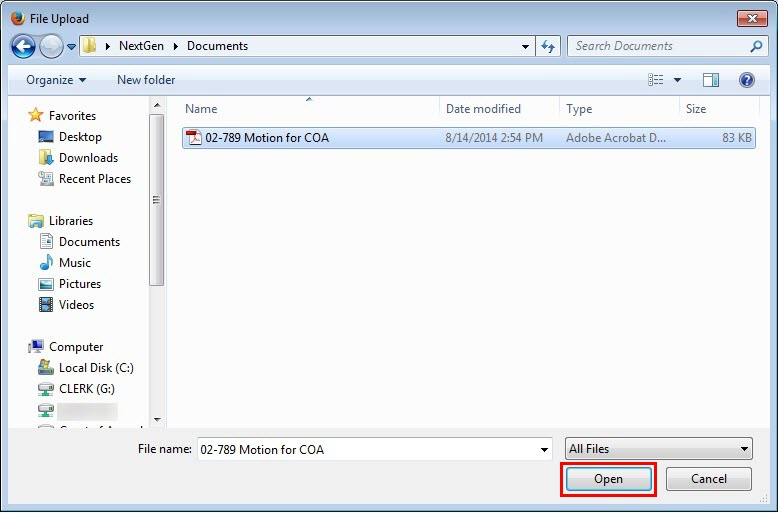
2. The File Upload dialog box opens. Navigate to the folder containing the PDF. Select the PDF file to attach by clicking the file name. The file name appears in the File name box near the bottom of the dialog box.
Click the Open button at the bottom right of the dialog box.
The File Upload dialog box closes and NextGen CM/ECF displays in the Document box the selected file name. The Description box automatically fills with the filing type selected on the previous screen.
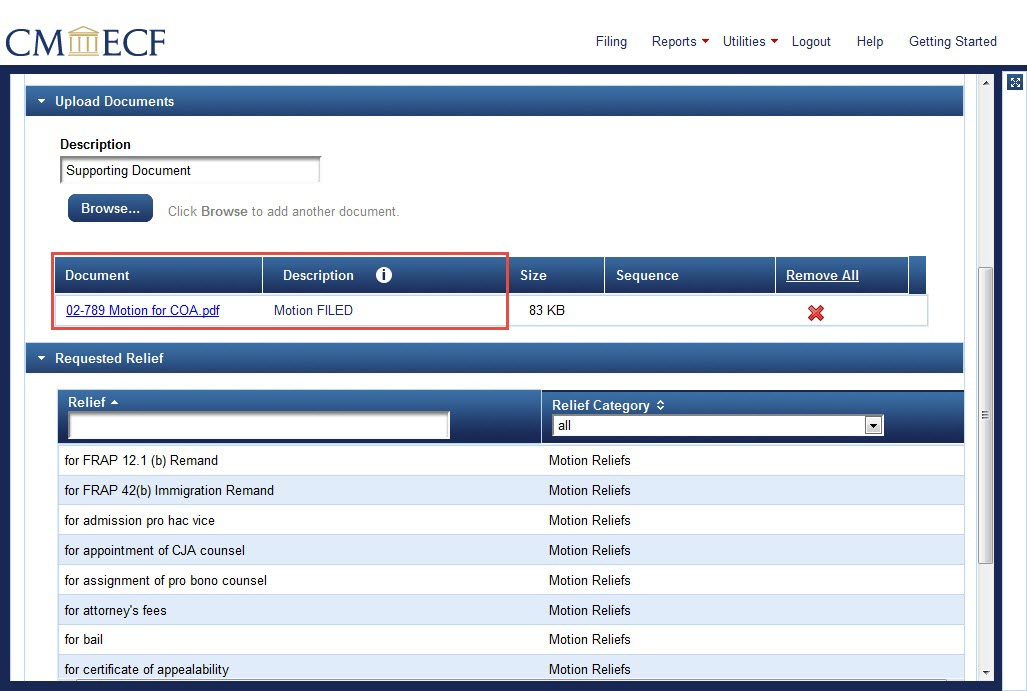
The file name is a hyperlink. To verify that the correct document is uploaded, click the hyperlinked file name to open the uploaded PDF.
3. The Description box now contains the description "Supporting Document." To upload another PDF to this filing (1) leave the description as it is or edit it to more specifically describe the additional document, and (2) repeat the steps above to navigate to the additional document and upload it to the filing.
Now both documents and their descriptions appear in the Upload Documents section of the screen.
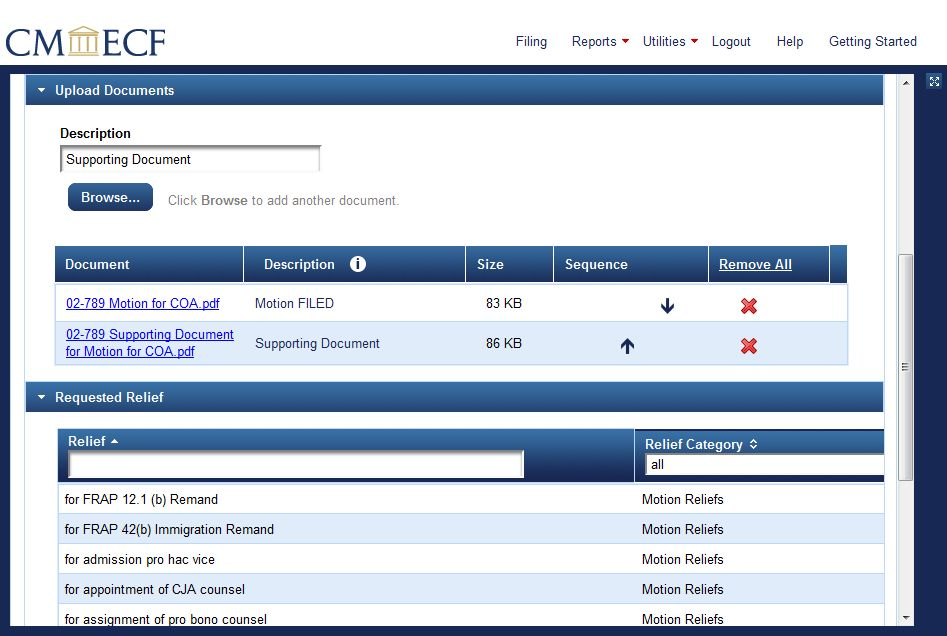
Use the up and down arrows under Sequence to change the order in which the documents appear in the filing, if necessary. Click the matching red X under Remove All to remove either of the documents, or click Remove All to remove both.
To attach another document, repeat step 3.
4. When all PDFs are uploaded to the filing, scroll down to the next section of the screen. When filing a motion, as in the example above, the next section is Requested Relief.
Only certain filings show Requested Relief as the next section of the File a Document screen; for other filing types the next section of the File a Document screen is different:
When filing an opposition, a non-opposition response, or a response to an opposition, the next section of the File a Document screen is Related Entries; for instructions on creating related entries, click here.
When filing a brief or appendix, the next section of the File a Document screen is Service; for an example, click here.
When filing as a non-party, the next section of the File a Document screen is Service; for an example, click here.
When filing a stipulation, the next section of the File a Document screen is Service; for an example, click here.
When filing correspondence, forms, or letters, the next section of the File a Document screen is Service; for an example, click here.
When filing an EOIR record on appeal, there is no next section of the File a Document screen, just a Continue button; for an example, click here.
The next step in filing a motion is to select the requested relief.
Last modified at 10/16/2014
|